Archives 2023

Understanding Thermostat Wiring: How to Connect Your AC System

Dealing with thermostat wiring can be intimidating for many homeowners. Whether installing a new system, troubleshooting an existing one, or just curious about how it all works, this guide is designed to provide a clear and concise understanding of the process.

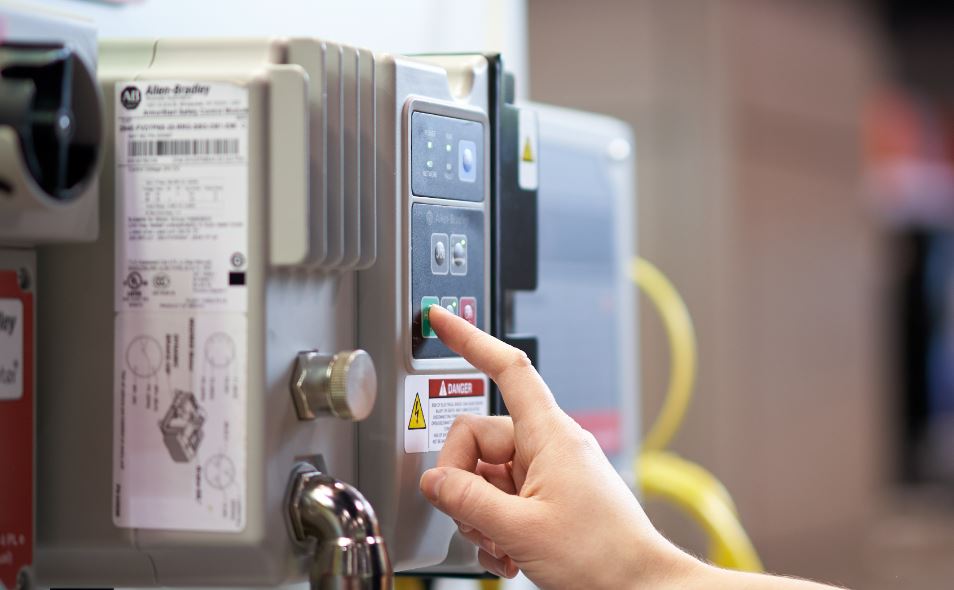
Before we dive into the specifics, it’s crucial to emphasise the importance of safety. Dealing with electrical systems, particularly those integrated with your home’s HVAC system, requires caution. If at any point you feel uncertain or uncomfortable with the process, we strongly recommend consulting a professional. This guide is intended for informational purposes and should not replace professional advice.

In this post, we’ll cover the basic concepts of thermostat wiring, including the types of thermostats and their functions, the tools and materials you’ll need, and a detailed explanation of wire labels and functions. We’ll walk you through a step-by-step guide on connecting your AC system, offer troubleshooting tips for common issues, and advise when to call a professional.

Thermostat Wiring

Whether you’re a DIY enthusiast or simply looking to understand more about your home’s heating and cooling system, this guide will provide valuable insights. So, grab your tools, and let’s get started!

Basic Concepts of Thermostat Wiring

At its core, a thermostat is a temperature-sensitive switch. It monitors the temperature in your home and turns the heating or cooling system on or off to maintain the desired temperature. Advanced models can even learn your preferences and adjust settings automatically to enhance comfort and energy efficiency.

Types of Thermostats

  • Programmable Thermostats: These allow you to set temperature schedules for different times of the day or week. For instance, you can program the thermostat to lower the heat when you’re not home, saving energy.
  • Non-Programmable Thermostats: Simpler in design, these thermostats require manual adjustment whenever you want to change the temperature settings.
  • Smart Thermostats: A leap in thermostat technology, smart thermostats connect to your home’s Wi-Fi network, allowing remote control via a smartphone or voice commands. They often come with features like energy usage reports, weather forecasts, and the ability to learn from your habits.

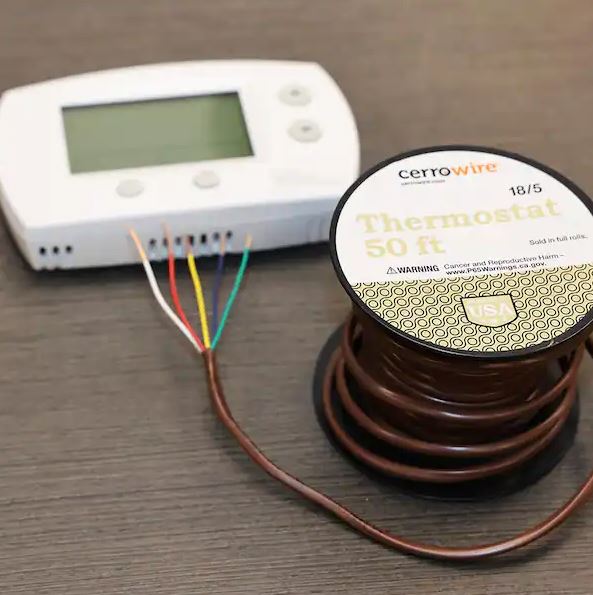
Common Wire Types and Their Purposes

  • R (Red Wire): This is the power wire from the transformer.
  • W (White Wire): Controls the heating system.
  • Y (Yellow Wire): Connected to the compressor and controls the cooling system.
  • G (Green Wire): Operates the fan.
  • C (Common Wire): Often a blue or black wire, it provides a return path for continuous power to the thermostat.

Tools and Materials Needed

List of Necessary Tools

  • Screwdrivers: Both flat-head and Phillips-head screwdrivers are typically needed.
  • Wire Strippers: Essential for removing insulation from the ends of wires to make connections.
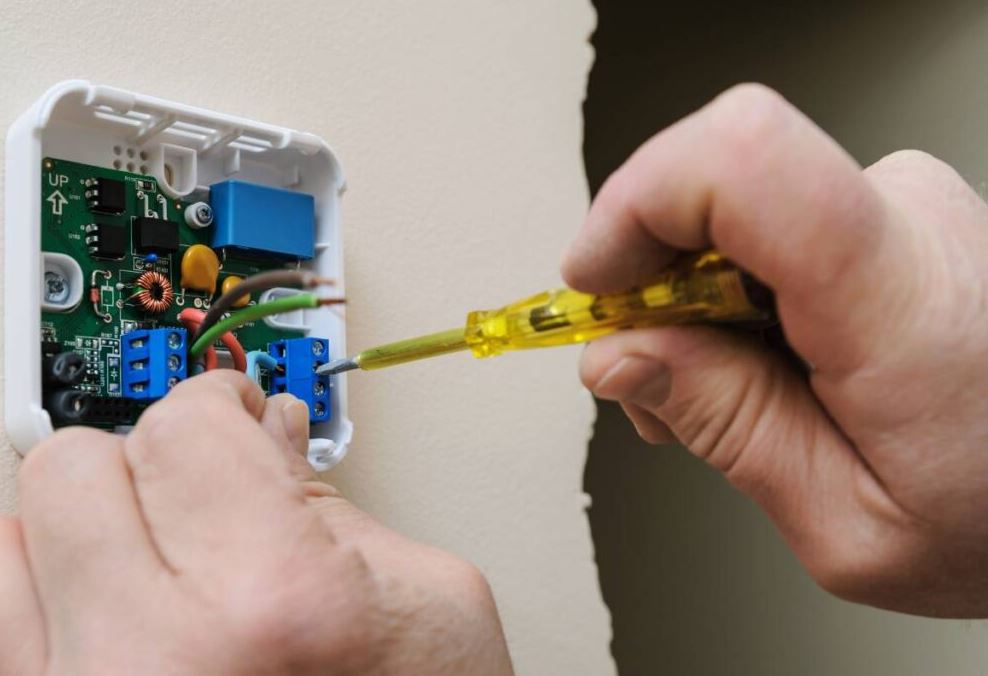
  • Voltage Tester: To ensure safety, check for live wires.
  • Level: To ensure the thermostat is mounted evenly on the wall.
  • Drill and Drill Bits: If mounting the thermostat to a wall, especially if you need to drill new holes.

Specific Materials Required

  • Wire Labels: Important for labelling each wire before disconnecting your old thermostat.
  • Thermostat Wire: In case you need to replace or extend existing wires.
  • Mounting Screws and Anchors: Typically provided with a new thermostat.
  • Batteries: Some thermostats require batteries, either as a primary or backup power source.

Understanding Wire Labels and Their Functions

Navigating the myriad of wire labels in thermostat wiring is crucial for a successful installation or troubleshooting process.

Standard Wire Colors and Their Corresponding Functions

  • Red (R): This wire powers the thermostat. You might see RC (for cooling) and RH (for heating) in a two-transformer system.
  • White (W): Connected to the heat relay or valve.
  • Yellow (Y): This wire connects to the compressor relay and controls the air conditioner.
  • Green (G): Operates the fan relay and controls the fan in auto or manual modes.
  • Blue or Black (C): The common wire completes the circuit and provides a steady power supply.

Less Common Wire Colors or Configurations

  • Orange (O) and Dark Blue (B): Used in heat pump systems. The O wire controls the reversing valve in the cooling mode, while B controls it in the heating mode.
  • Brown (E): Often found in heat pumps, the E wire activates emergency heating.
  • Pink or Tan: These can be auxiliary wires or for custom setups, depending on the system.

Step-by-Step Guide to Connecting Your AC System

Step 1: Power Off Your HVAC System and Thermostat

Safety first. Ensure all power to your HVAC system and thermostat is completely turned off. This can typically be done at your home’s main electrical panel by switching off the breaker connected to your heating and cooling system.

Step 2: Remove the Thermostat Faceplate and Inspect Existing Wiring

Carefully remove the faceplate of your existing thermostat. This is usually achieved by gently pulling or unscrewing it from the base. Examine the wires and the terminal screws they’re connected to. Take note of any peculiarities or differences from standard wiring setups.

Step 3: Label the Wires Before Disconnecting Anything

Before disconnecting the wires, label each one according to the attached terminal. This step is crucial for ensuring that you reconnect the wires correctly to the new thermostat.

Thermostat Wiring

Step 4: Detailed Steps for Connecting Each Wire to Its Proper Terminal

  • R (Red Wire): Connect this to the R terminal. If your system has separate transformers for heating and cooling, connect RH and RC correctly.
  • W (White Wire): Attach this to the W terminal for heating control.
  • Y (Yellow Wire): Connect to the Y terminal, which controls the air conditioning compressor.
  • G (Green Wire): This goes to the G terminal and controls the fan.
  • C (Common Wire): Attach it to the C terminal if present. This wire is important for providing continuous power to the thermostat.

Step 5: Reattach the Thermostat Faceplate and Power on the System

Once all wires are securely connected, carefully mount the new thermostat faceplate onto the wall. Ensure all connections are snug and the faceplate is level.

Step 6: Test the System to Ensure Proper Functioning

After restoring power to your system:

  1. Test the thermostat.
  2. Verify that the heating, cooling, and fan operations work as expected.
  3. Adjust the settings to ensure the system responds correctly.

Troubleshooting Common Wiring Issues

Diagnosing and Resolving Common Problems

  • AC Not Turning On: Check for loose connections or incorrectly wired terminals. Ensure the power source to your HVAC system is on.
  • Incorrect Temperature Readings: This could be due to poor thermostat placement (e.g., near a heat source) or a malfunctioning sensor.

Tips for Maintenance and Regular Checks

  • Regularly check and clean your thermostat.
  • Ensure the wiring connections remain tight and secure.
  • Replace batteries periodically if your thermostat uses them.

When to Call a Professional

Situations That Require Professional Help

  • If you encounter complex wiring systems, especially in older homes.
  • In case of consistent malfunctions despite troubleshooting.
  • When installing advanced thermostats requiring intricate wiring.

How to Find a Qualified HVAC Technician

  • Look for licensed and insured HVAC professionals.
  • Check online reviews or ask for recommendations from friends and family.
  • Ensure they have experience with your particular thermostat model and HVAC system.

AirSmart Air Con is a company that ticks all the boxes. 

We’ve covered the essential steps and considerations in thermostat wiring, from understanding the basics to troubleshooting common issues. Remember, accuracy in wiring and safety are of paramount importance. Don’t hesitate to consult a professional if you’re uncertain about any step in the process. By following these guidelines, you can ensure your home’s temperature control system operates efficiently and safely.

Signs That Your Home’s Electrical Wiring Needs Attention

Proper electrical wiring is the silent hero that keeps our homes functioning smoothly, powering our everyday lives, from our morning coffee makers to our late-night TV binge sessions. However, this integral system can become an invisible danger when neglected or issues are ignored. 

Faulty wiring is not just a minor inconvenience – it poses serious risks such as electrical fires, shocks, or even electrocutions. Recognizing the signs of an overtaxed, outdated, or damaged electrical system is essential for every homeowner. 

This blog post aims to arm you with the knowledge to identify these warning signals and understand the steps you need to take for a safer home. We will dive into the basics of electrical systems, highlight the key warning signs indicating a problem, and guide you on what to do when you come across these signs. So, let’s enlighten ourselves to ensure our homes remain a haven, free of electrical hazards.

Understanding Electrical Wiring Basics

Your home’s electrical system is a complex network of wiring, outlets, and circuits designed to provide power to all corners of your residence. It starts at the electrical supply grid, leading to the meter, which records your electricity usage. From there, the electricity flows through the circuit breaker panel, which distributes to various circuits in your house. Each circuit is designed for different power loads, supplying electricity to different appliances and outlets.

Electrical Wiring Needs Attention

Electrical wiring plays a pivotal role in the safety and functionality of your home. It ensures a safe and regulated power flow, minimizing risks like electrical fires and shocks. Effective wiring optimizes power consumption and provides steady, reliable electricity to your appliances, promoting their longevity and proper functioning.

Warning Signs That Your Electrical Wiring Needs Attention

One key indicator of a problem with your home’s wiring is frequent electrical surges. These brief events, which can last only a millisecond, may be caused by damaged power lines, faulty appliances, or poor wiring in your home. While they often go unnoticed, repeated surges can degrade the lifespan of your home’s electrical components and represent a potential fire risk.

Another red flag is the frequent tripping of your circuit breaker. This safety device is designed to switch off in the event of an overload to prevent overheating and potential electrical fires. If it is tripping frequently, it may be a sign of larger electrical issues, including faulty wiring.

Dimming or flickering lights can also signal a problem. While this can be due to issues with the bulb or fixture itself, it can also indicate wiring or circuit problems, especially if the issue is observed in multiple fixtures.

Pay attention to a burning smell or discolouration around outlets and switches. This could suggest heat buildup and potential burning or arcing inside the walls—a clear fire risk. Frequent shocks when touching appliances or switches also indicate a grounding issue or a problem with the wiring.

Lastly, high electricity bills can hint at electrical system inefficiency, potentially resulting from faulty wiring. Examine your bills for unexplained increases and consider if your appliances consume power as they should.

What to Do When You Notice These Signs

If you notice these signs, it’s important to act swiftly. Start by safely investigating the issue without touching or tampering with the electrical system. This could involve noting when the issue occurs or if it’s tied to using a specific appliance or circuit.

However, unless you are a trained professional, it is best not to attempt any electrical repairs yourself. Instead, call in a professional electrician like electricianssunshinecoast.com. They have the skills and equipment to identify and address the problem safely. During an electrical inspection, they will test the system, identify wiring problems, and recommend necessary repairs or replacements.

Preventive Measures to Keep Your Electrical Wiring in Good Shape

Routine inspection and maintenance are key to keeping your home’s wiring in good shape. This will help identify potential issues before they become serious problems.

Moreover, consider an upgrade if your home is older or your wiring has been updated a while ago. Modern wiring systems are more efficient and safer.

Electrical Wiring Needs Attention

Remember to use your electrical appliances and systems safely. Avoid overloading circuits or using appliances with frayed or damaged cords. Educate yourself and your family about basic electrical safety measures. This includes not touching electrical outlets or switches with wet hands and not inserting metal objects into the outlets.

Remember, your home’s electrical system is vital to your daily life. By understanding how it works and identifying the warning signs of problems, you can ensure its longevity and your safety. When in doubt, always turn to a professional for help.

In conclusion, staying vigilant and attentive to the potential signs of faulty electrical wiring in your home is crucial. Remember, frequent electrical surges, regular tripping of the circuit breaker, dimming or flickering lights, a burning smell or discolouration around outlets, frequent shocks when touching appliances or switches, and unexpectedly high electricity bills are all indications of potential electrical issues that need immediate attention.

When you encounter these signs, start by safely investigating the issue and taking note of the symptoms. Yet, trying to fix these problems yourself is important only if you’re a trained professional. Instead, contact a qualified electrician who can conduct a comprehensive inspection and suggest necessary repairs or replacements.

Moreover, preventive measures are equally critical to maintain your electrical wiring in good shape. Routine inspections, updating outdated wiring systems, safe usage of electrical appliances, and educating yourself and your family about basic electrical safety measures can help prevent serious electrical problems.

Maintaining electrical safety in the home should never be an afterthought—it’s an ongoing responsibility. After all, a well-functioning electrical system not only ensures a comfortable, hassle-free living environment but, more importantly, protects the safety and well-being of your family. Stay informed, stay vigilant, and consult a professional when in doubt.

Electrical Safety Tips: Protecting Your Home from Electrical Hazards

Electricity is an essential part of our lives. From powering appliances to lighting our homes, we rely on it daily. However, its ubiquitous presence can sometimes make us complacent, forgetting the potential risks associated with improper handling. Therefore, understanding how to protect your home from electrical hazards is crucial.

Let’s explore essential electrical safety tips for homeowners to prevent electrical accidents and mitigate hazards.

Electrical Safety

Proper Use of Electrical Outlets

Most electrical incidents occur due to the improper use of outlets. These sockets should never be overloaded with multiple appliances, which could lead to overheating and potentially spark a fire. A power strip with a built-in surge protector is a safer alternative when you need to plug in multiple devices.

Ensure that you use the correct plug type for each outlet. Forcing a three-pronged plug into a two-pronged outlet, for example, is dangerous and can lead to electric shock or fire. Lastly, never operate electrical outlets with wet hands or in damp areas unless they are specifically designed for such environments.

Identifying and Addressing Overloaded Circuits

An overloaded circuit is more than just an inconvenience. It is a severe safety hazard that can result in electrical fires. You can usually identify an overloaded circuit if your circuit breaker frequently trips, if your lights dim when you use multiple appliances, or if outlets and switches are warm to touch.

To address this issue, try to balance your electrical load across multiple circuits. Avoid plugging multiple high-wattage appliances into the same circuit. If the problem persists, it’s time to call a professional electrician to inspect your home’s electrical system.

Childproofing Outlets

If you have little ones in your home, childproofing electrical outlets is a must. Simple plastic outlet covers can prevent children from inserting objects into the sockets. For a more permanent solution, consider installing tamper-resistant receptacles (TRR). These outlets have a shutter system that only opens when both prongs of a plug are inserted simultaneously.

Handling Electrical Cords Safely

Electrical cords may seem harmless, but they can pose a significant safety risk if mishandled. Never tug on a cord to disconnect it from the outlet; instead, pull it out by the plug. Avoid running cords under carpets or across doorways to prevent tripping and damage. Inspect cords regularly for any fraying or cracking, and replace damaged cords immediately. Extension cords should only be used as a temporary solution. For long-term use, hire an electrician to install additional outlets.

Recognizing Signs of Electrical Issues

Early detection of electrical issues can prevent more significant problems down the line. Signs to watch for include frequent electrical shocks, burning smells, buzzing sounds, or flickering lights. These could indicate problems like faulty wiring or an overloaded circuit.

Electrical Safety

Always turn off and unplug any appliance that gives you a shock, and call an electrician for further investigation. Don’t ignore these warning signs as they could lead to serious safety hazards, including fires.

The Importance of Regular Electrical Inspections

Regular inspections of your home’s electrical system can identify potential problems before they escalate into severe issues. A licensed electrician can check your home’s wiring, outlets, circuit breakers, and other electrical components to ensure they’re in good working order. It’s generally recommended to have your home inspected every 3-5 years, or if you notice any unusual electrical issues.

Hiring a Licensed Electrician for Complex Tasks

While there are some electrical tasks you can safely do yourself, such as changing a light bulb or resetting a tripped breaker, most electrical work should be left to the professionals. A licensed electrician has the training and knowledge to perform these tasks safely and effectively. Whether it’s installing new outlets, replacing a circuit breaker, or upgrading your home’s electrical panel, always hire a professional.

Remember, electricity is unforgiving; one small mistake can have disastrous consequences. Therefore, prioritizing electrical safety in your home should never be an afterthought. By following these tips, you can protect your home and loved ones from electrical hazards and create a safer living environment.

Stay safe, stay smart, and remember – when in doubt, call a professional!